Imagine you’re peacefully admiring your aquarium, when suddenly you notice water slowly trickling out from a tiny crack. Don’t panic! In this article, we’ll guide you through the simple steps to fix that pesky leaking in your aquarium, so you can get back to enjoying your aquatic oasis without any worries.
Identify the Cause of the Leak
If you’ve discovered a leak in your aquarium, the first step is to identify the cause so you can effectively address the issue. There are a few common areas to inspect when trying to pinpoint where the leak is coming from.
Inspecting the Tank for Leaks
Start by thoroughly examining the tank for any visible signs of water leakage. Look for wet or damp spots on the glass panels or any water pooling outside the tank. You may also notice discolored areas or mold growth around the leak. Keep in mind that some leaks may be small and hard to detect, so be sure to inspect the tank carefully.
Checking Equipment for Malfunctions
While the tank itself is often the culprit of leaks, it’s essential to inspect the equipment associated with the aquarium as well. Check all hoses, connectors, and valves for any signs of damage or loose connections. Faulty or damaged equipment can also lead to leaks, so it’s crucial to examine every component thoroughly.
Finding the Source of the Leak
Once you’ve inspected the tank and equipment, try to determine the exact source of the leak. It could be a crack in the glass panels, a damaged or improperly sealed seam, or even a leakage in the filter system. Identifying the specific cause will help you choose the best method to fix the leak and prevent future occurrences.
Temporary Fixes
While you work on a more permanent solution, there are a few temporary fixes you can employ to stop or minimize the leak. These quick remedies can buy you some time until you can fully address the issue.
Using Aquarium Sealant
Aquarium sealant is a versatile product specifically designed to seal leaks in aquariums. It forms a watertight seal and can be applied directly to the damaged area. Clean the affected spot, remove any loose debris, and carefully apply the sealant. Allow it to dry according to the manufacturer’s instructions before reintroducing water to the tank.
Applying Epoxy Putty
Epoxy putty is another temporary fix that can effectively seal small leaks in your aquarium. It’s a two-part adhesive that creates a strong bond when mixed together. Similar to the aquarium sealant, clean the affected area before applying the putty. Mix the two components of the epoxy putty, then apply it over the leak. Leave it to harden as per the instructions provided.
Using Silicone Tape
Silicone tape is another handy temporary fix for leaks in aquariums. This self-fusing tape creates a tight seal when wrapped around the damaged area. Start by cleaning the leak site, remove any loose particles, and wrap the silicone tape tightly around the area. Ensure it covers the leak entirely. The tape will adhere to itself, forming a waterproof barrier to stop or reduce the leak.
Repairing Damaged Seams
If the leak is coming from a damaged seam in your aquarium, you’ll need to perform a more thorough repair. Follow these steps to fix the damaged seams properly.
Tools and Materials Needed
Before you begin repairing the damaged seams, gather the necessary tools and materials. You’ll need aquarium silicone sealant, a putty knife or scraper, a clean cloth, rubbing alcohol, and gloves to protect your hands.
Draining the Tank
To repair the damaged seam, you’ll need to drain your aquarium. Carefully remove all the fish, plants, and decorations, and place them in a separate container temporarily. Keep the tank water in a safe place if possible, so you can reuse it later.
Drying the Seams
Once the tank is empty, use a clean cloth to dry the damaged seams thoroughly. Ensure there is no moisture remaining, as this will help the silicone sealant adhere to the glass properly.
Preparing and Applying Aquarium Sealant
With the damaged seams dry, it’s time to prepare the aquarium silicone sealant. Apply the sealant directly to the damaged seam using a putty knife or scraper, ensuring proper coverage. Smooth out the sealant with the tool to create an even layer. Be sure to follow the manufacturer’s instructions regarding drying and curing times before refilling the tank with water and reintroducing your aquatic inhabitants.
Replacing a Cracked Glass Panel
If the leak is due to a cracked glass panel, you’ll need to replace the affected piece. Here is a step-by-step guide to assist you in replacing the cracked glass panel.
Removing the Affected Panel
Before removing the cracked glass panel, drain the aquarium as described earlier. Once the tank is empty, carefully remove any silicone sealant holding the panel in place. Use a putty knife or scraper to scrape off the sealant, ensuring not to scratch or damage the surrounding glass panels. Once the sealant is removed, gently pry the cracked panel away from the tank.
Cleaning the Surrounding Seams
After removing the cracked panel, take the time to clean and prepare the surrounding seams. Scrape off any remaining sealant using a putty knife or scraper. Wipe the area clean with a cloth and use rubbing alcohol to ensure there is no debris or residue left.
Installing the New Glass Panel
With the surrounding area clean, it’s time to install the new glass panel. Apply a thin, even layer of aquarium silicone sealant to the edges of the replacement panel. Carefully position the new panel in place, pressing it firmly against the tank’s remaining glass panels. Allow the sealant to dry according to the manufacturer’s instructions before refilling the tank and reintroducing your aquatic friends.
Addressing Leaking Filter System
If the leak is originating from your aquarium’s filter system, follow these steps to troubleshoot and fix the problem.
Inspecting the Filter System
Start by inspecting the filter system thoroughly. Check all hoses, connections, and valves for any signs of damage, loose fittings, or wear and tear. Look for cracks or leaks in the filter housing as well. Identifying the faulty component or area will help determine the next steps to take.
Replacing Faulty Parts
If you identify a faulty part within the filter system, it’s important to replace it promptly. Contact the manufacturer or visit a reputable aquarium supply store to find the specific replacement parts you need. Remove the faulty component carefully, following the manufacturer’s instructions, and replace it with the new one. Ensure all connections are secure and tight to prevent any future leaks.
Properly Sealing Connections
Even if the filter system components are functioning correctly, leaking can still occur if the connections are not properly sealed. Check all fittings, hoses, and valves to ensure they are tight and secure. Apply aquarium silicone sealant or thread seal tape to any connections that may be causing a leak. This will create a watertight seal and prevent future issues.
Preventing Future Leaks
Now that you’ve resolved the leak in your aquarium, it’s crucial to take steps to prevent future occurrences. By following these tips, you can minimize the risk of leaks in your tank.
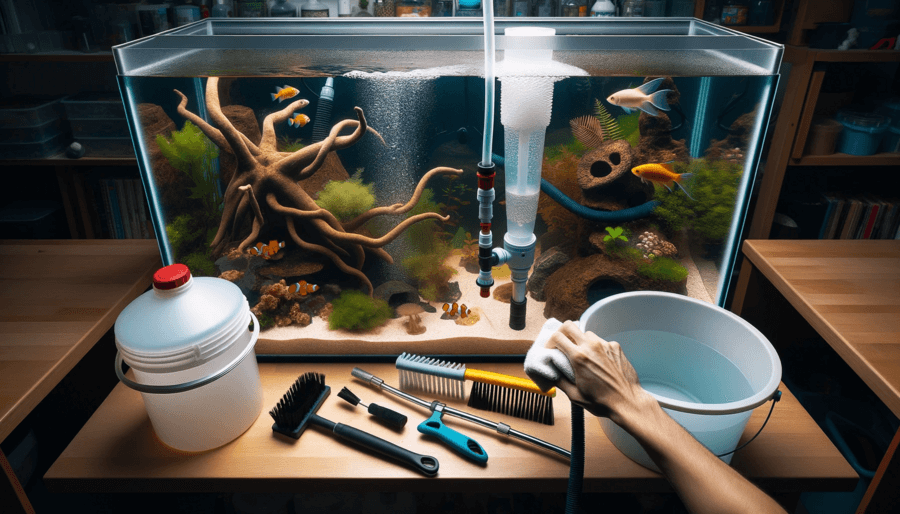
Performing Regular Tank Maintenance
Regular tank maintenance is essential for preventing leaks and keeping your aquarium in top condition. Clean the tank regularly, remove any debris, and inspect the glass panels and seams for any signs of damage. Additionally, be sure to replace worn-out equipment, such as hoses or filters, before they can cause leaks.
Avoiding Overloading the Tank
Avoid overloading your tank with too many fish or decorations. A heavily populated tank can put excessive pressure on the seams and increase the chances of leaks. Research the appropriate number of fish for your tank size and ensure there is enough space for them to swim comfortably. Similarly, avoid overcrowding the tank with decorations, as they can accidentally damage the glass panels or put unnecessary strain on the seams.
Using High-Quality Equipment
Investing in high-quality equipment for your aquarium can have a significant impact on preventing leaks. Choose reputable brands known for their durability and reliability. Cheap or subpar equipment may not be designed to withstand the demands of maintaining a stable aquatic environment, increasing the risk of leaks and other issues. It’s worth investing in reliable equipment to ensure the long-term integrity of your aquarium.
Conclusion
Discovering a leak in your aquarium can be a stressful experience, but with the right knowledge and tools, you can address the issue effectively. Start by identifying the cause of the leak, whether it’s a damaged seam, cracked glass panel, or a faulty filter system. You can apply temporary fixes such as using aquarium sealant, epoxy putty, or silicone tape to stop the leak temporarily while you work on a permanent solution. If there’s a damaged seam, follow the proper steps to repair it, including draining the tank, drying the seams, and applying aquarium silicone sealant. For a cracked glass panel, you’ll need to replace the affected piece, ensuring proper cleaning and sealing. When dealing with a leaking filter system, inspect, replace faulty parts and seal connections properly. Finally, take preventive measures such as regular tank maintenance, avoiding overloading the tank, and using high-quality equipment to minimize the risk of future leaks. With these steps in mind, you can maintain a leak-free and thriving aquarium for years to come.